
Saturday, January 31, 2015
Your Pictures are Never Safe on Facebook...
I totally forgot about this project! My son's best friend posted a picture of her grandmother, when younger, on Facebook and I borrowed it to play around with in Silhouette Studio. I had never traced a photo before but wanted to see if I could. The picture was already in black and white so I didn't have to convert it, but the end results are much better when using a black and white photo. Picmonkey is a great place to go to convert your photos if you don't have any photo editing software! I brought the jpg into Silhouette Studio, selected the area I wanted to trace and then played around with the high pass filter and threshold until I was left with the best result I could achieve. After tracing it, I then went and zoomed really close into the picture and deleted or erased as many of the small dots and such that I could as they would be heck to weed! Ok, So, once I got the design the way I wanted it, I mirrored it, cut it out, weeded it and applied it to the back of the glass. Everything went GREAT!!! I had it all finished in no time and realized I had a few finger prints on the glass, so I took a dry baby wipe I had (don't recommend baby wipes as they catch on the vinyl and leave little white fuzzies) and was wiping them off and BAM- I broke the glass!!!!!! I am not going to type what I said as it wasn't very lady like at all!!! I walked away and took a bit of cooling off time before I went back and tried again. Oh My Good Gracious, if it could go wrong, it DID the second time around. I started in the morning and didn't finish until late evening!!! I lost letters weeding, letters were tore up while cutting, transfer tape wouldn't pick up the letters and SO much more! I can't tell you how many times I had to go in and edit the saying to get only the words or letters I needed, then applied those to the glass and realized I lost half my dots on my "i's" and my comma!!! I finally managed to get it back together and shared a picture only to be told the dot in the i in "bit" was missing!!! I sat there and said I KNOW all the dots were there as I double and triple checked it when I finished! Then I started thinking, I wiped the glass to remove smudges and I bet it took my dot- went to look at the cloth and sure enough, there was my dot, LOL So, it was an all day job but I am so tickled with the end result and my son's best friend was in awe when she saw it!! I posted the finished project picture on Facebook but didn't say who it was or who it was for, but she knew instantly so that made me happy! So, here is my finished photo! (The dot IS missing on this picture in bit, as I didn't take another one after I replaced it, and the picture isn't the greatest due to it being night when I finished and took it)


I finally "played" again!!!!
Wow, it's been a LONG time since my last post, or creation for that matter!!! I didn't make the first thing for Christmas Gifts this year, but I did make a few cards, just failed to post pictures of them! I finally broke out of the "collecting" stage today and created something again!!! I took some ice cream buckets I had and made Easter Buckets for my great niece and nephew! This was my first time layering vinyl so it isn't perfect but I am pleased with them! My sons gave me a Silhouette Cameo for Christmas and I am having a blast learning all it can do! SO much nicer than my Expression, if a bit louder, LOL Now, you know on the buckets it wasn't just cut, apply and done- that would never be "my" way of crafting, LOL I cut, recut, applied, removed, recut again and applied! The green egg on the truck was cut at least 4 times by itself!!! I did something wrong on my stars on the truck one and they cut and then cut again in a different spot on the same piece of vinyl so that was wasted as well! I think I waste more than I actually use on the finished project! I can't imagine selling things as it took me all afternoon just to get these two things completed- how do people do it? Maybe with time and a bit more practice, instead of just collecting files, I can start to get a bit quicker and maybe, just maybe, have less mishaps along the way!!! Nope, not holding my breath, LOL
 I also would love to share a picture of my great nephew (another one, not Skyler), "painting" last night while he was over visiting. We are starting him early on the creating!!!
 Well, if you stayed with me this long, I appreciate your looking at my latest and greatest! I have a "great idea" in my head for something I want to try tomorrow, so hopefully I will be back to share that as well!!! *Hugs*
 I also would love to share a picture of my great nephew (another one, not Skyler), "painting" last night while he was over visiting. We are starting him early on the creating!!!
 Well, if you stayed with me this long, I appreciate your looking at my latest and greatest! I have a "great idea" in my head for something I want to try tomorrow, so hopefully I will be back to share that as well!!! *Hugs*
Saturday, October 4, 2014
World Card Making Day!!!
I couldn't miss out on playing today, so I worked on a simple card for my great nephew. He is turning 1 on the 17th. The main head part is on a wobbler and then I added google eyes so it is fun to play with. His mom will watch him close with those google eyes!!! I had a great time playing again! Of course, I *HAD* to mess up someplace, so here it goes- I had my cutter set to cut vinyl and failed to check before cutting!!! I could not figure out why the pieces were only partially cut out, then it hit me- DUH, check your settings always before you cut girl! You would think I would learn with the many times I have done this in the past, LOL Hope this finds everyone well! *Hugs*

Wednesday, July 23, 2014
It must be snowing in S. Carolina...
...As I am finally getting around to playing again! It has been SO long since I even turned my poorly neglected Cricut on, but I got some files from Bird's Cards yesterday and just had to cut them out for a card for my brother! As most of you know, he is in prison so the cards have to be fairly simple without any added ribbon or other decorative options (learned quickly not to use embossing powder as they sent all the cards back I did in the beginning, LOL). This was a simple card, just cut out the files and used my sticker maker to put them on the card after applying a front layer. It was fun to play again and I might even do it again before 6 months pass, LOL I do have a blip on it as the curly Q folded up on me when I was applying it so now it has a crimp in it and one corner didn't cut fully so I just put a rounded edge on it as I didn't realize it was a fancy edge, LOL *Hugs*
.jpg)
.jpg)
Monday, December 30, 2013
Christmas 2013
I am finally getting around to uploading my Christmas Decoration Pictures and thought I would share them here so I can easier find them next year, LOL Believe it or not, I didn't put out all of my decorations this year as I really didn't want to decorate at all but I was talked into it via family. I didn't decorate the Paper Playground at all this year and that is just pure laziness! I pray everyone had a wonderful holiday season and only the best in 2014! *Hugs*


Sunday, November 24, 2013
Still alive and kicking in North Augusta!
I am still alive and kicking but have not been able to create a thing successfully to share here lately! So, I will share the newest love of my life. His name is Snickers and he is a terrdle (Terrier and Poodle mix). He's 4 1/2 months old and a total character. He gets along well with the other dogs except my son's dog who despises him, LOL I think he's a bit hyper for Axel to handle. I am thrilled having him in my life though as he brings so much joy and love to anyone he comes in contact with. *Hugs* 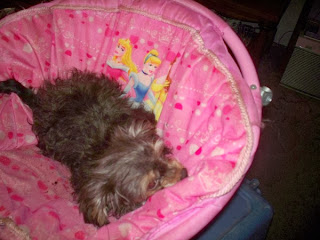.jpg)
.jpg)
.jpg)
.jpg)
Sunday, September 1, 2013
M-I-C-K-E-Y...
That loveable, most famous mouse of all! My great-nephew, Skyler (at 6 months old) just LOVES MM so when I saw this mini paint can (left over from a gift pack of bubblegum) I knew it was just for him! It took me forever to find a headshot that would cut small enough to fit on the lid but I hung in there and finally got it completed! It will look so cute in his new bedroom holding cotton balls or anything else they need it for! *Hugs*


Sunday, August 18, 2013
Where Have the Days Gone???
Wow, it doesn't seem like it has been "THAT" long since I posted, but umm, yeah, it has, LOL I, do finally, have something to share. I have seen all these cups people are making and am in awe of them, so I tried one myself. This is for my Great Niece, Faith. I set up the name on Scal, doubled it and set the second one as blackout rounded at about 3 inches. Then I weeded out the unnecessary pieces and layered by eyeballing it. I cut the tiny butterflies (purple), 3/4" white dots and 1" light pink dots (some look darker in the picture but they are all light pink) with punches (warning, they are a bear to get removed off the backing) and just placed them here and there. I am tickled pink with how it came out and can't wait to give it to her next weekend! I'm sorry the picture isn't much easier to see but the bottle is rounded so hard to get it all in one shot! *Hugs*


Wednesday, March 13, 2013
Blowing in the Wind
That is what I was thinking of when I created this card! The "flower" is one my best buddy has the die for so she cut me a bunch out of different color papers. I used a pre-made card base and just cut out a piece of paper to go on the front, cut my "grass" with my grass making scissors (can't for the life of me recall what they are actually called, LOL), ran my ribbon through my Xyron to make it sticky and just stuck it all together. I stamped the "with love" and used a nestie to cut it out with. My inspiration came from a card I found on Google while searching for "Handmade" or "Homemade Cards". I enjoy looking at other's cards while I sit and watch tv at night so I am either on Pinterest or Google, LOL *Hugs*
.jpg)
.jpg)
Wedding Card 3
My great nephew finally came home from the hospital today :) I haven't seen him yet but hope to later! This is the final wedding card I needed to make for my niece- it took me two days to complete due to sinus issues kicking me down! I cut the main base at 12X6 as some tuts called for 12X5 and others 12X7 so I took the middle road, LOL I scored it at 3" and 9". I found the image of the butterfly bride online and it is perfect as her theme is butterflies and rainbows! I just printed it off SCAL (only reason is I can get the exact size I want easier there) and then fussy cut around the edges of both the bride and groom. I used my nesties to cut the outside stamped image and printed the inside saying and used a nestie to cut it out as well. I forgot to ink the edges of the outside stamped image but she will never know, LOL I am happy to have all three done and no major mishaps along the way! *Hugs*
.jpg)
.jpg)
.jpg)
.jpg)
Saturday, March 9, 2013
May They Live Happily Ever After!
I hope and pray they do! This is for my niece and her fiance who are getting married next month. I already made my card for her but this is for my mom to give them! I will still have to create one from my grandmother as well, LOL I totally scraplifted the idea for this one as well while on a blog hopping expedition. *Hugs*
.jpg)
.jpg)
Friday, March 8, 2013
Mishaps Happen
And sometimes they are a good thing! I pulled out this impressabilities from Spellbinders the other day and tried using my brayer to apply ink to the card. It left a decent impression but I wasn't overjoyed with it so I tried it with the Cuttlebug! I forgot to wipe the ink off and this is what came out- how beautiful is this?! I just love it! I will stamp a sentiment on it when I need it for whatever purpose later on. *Hugs*
.jpg)
.jpg)
Pinterest Again
I have got to stay away from this place, LOL Here are two more cards I saw there tonight that I had to lift and make myself. *Hugs*
.jpg)
.jpg)
.jpg)
.jpg)
Pinterest- enough said!
I went in search of some inspiration today in Pinterest and haven't gotten a single thing done in the house now, but I am sure some of you can relate, LOL I saw this simple card and had to recreate it in my own way and loved it when completed- until I took the picture! THEN I realized I had not pulled out my dots folder but the tiny hearts, LOL Oh well the thought was in tiny dots, LOL *Hugs*
.jpg)
.jpg)
Thursday, March 7, 2013
Photo is a mishap this time!
Ok, I have tried three times to take a picture of this card and each time I have either cut something off or made it so blurry it looked like hurricane season! I got the tutorial for this shadowbox card off The Frugal Crafter's site and it was so simple to put together and I love the outcome! It was supposed to have a pine cone, pine needles and a small branch on it but I guess my pine tree burned down as it did not happen, LOL *Hugs*
.jpg)
.jpg)
Monkees and Butterflies
No, I didn't misspell that, I am sitting here listening to The Monkees on Youtube while crafting! It can surely get your blood pumping but it takes me twice as long to get anything done for dancing, LOL I saw this card on Shirley's Blog ( http://shirleystemplates.blogspot.com/ ) and had to try it out! It cut beautifully, even the tiny flowers! "Cheer up Sleepy Jean" Oh, got side tracked again, LOL I am off to do some house work while I am pumped with energy! *Hugs*
.jpg)
.jpg)
Buttons!
I have seen so many cards that use buttons so neatly but I have never used any on mine. Tonight I decided I was going to use some and I am quite tickled with the results. The card is very similar to the one I made earlier in the week but I changed the colors a bit! I may just make a set and give them to my niece when she gets married next month. *Hugs*
.jpg)
.jpg)
Subscribe to:
Posts (Atom)